7 Yoga Poses for a Healthy Pelvic Floor

by Brianna Flaherty
Many of us barely know how the pelvic floor functions, let alone how to care for it. That’s a shame, because our pelvic floors do a lot for our bodies day-to-day, and we should really return the favor every once in a while. But unlike the exercises you know will strengthen your arms or tone your legs, working out your pelvic floor isn’t always as straightforward. !!!
That’s exactly why we asked our friend and expert yogini, Lindsay, to show us the way. She designed an easy, 10-minute flow to promote pelvic floor health and bring some awareness and TLC to one of the most important, yet oft-overlooked areas of the body. No need to see a physical therapist or go to a yoga class — just grab your yoga mat and do these pelvic floor exercises at home! Doing these yoga poses will stimulate your pelvic floor muscles and increase pelvic floor strength while promoting pelvic health.
If yoga isn’t your thing, there are many exercises (including but definitely not limited to kegels) to strengthen your pelvic floor. That said, yoga is not only clinically proven to improve cardiovascular health, stress levels, and flexibility, but studies also show that ~yogic intervention~ can reduce pelvic pain. Lindsay’s sequence uses breath and movement to wake up, engage, and rebalance the muscles in your floor. Bonus: it’s pretty relaxing, too. All you need is yourself and a yoga mat (and maybe some comfy, leak-absorbing undies).
1. Constructive Rest (Savasana Variation Bent Legs)
This yoga pose is all about bringing your body to a state of neutrality. Lie down with your feet wide on the mat, knees together, with both hands resting on your belly. Close your eyes, tune into your breath, and feel your stomach rise and fall. As you breathe in and out, engage your abdominal muscles at the bottom of every exhale.
Every time you breathe — not just when you’re practicing yoga — your diaphragm creates and releases pressure in your torso, and engages your pelvic floor. Feeling your breath is an easy way to do a pressure check on your floor (and remind yourself of all the work it’s doing throughout the day). As you move through the rest of the flow, try to keep up with these deep, intentional inhales and exhales.
2. Knees to Chest (Apanasana)
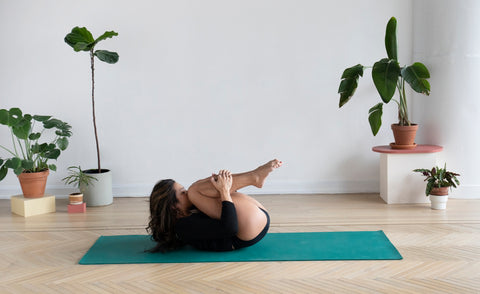
Draw your knees into your chest, hold onto your shins as you exhale, and engage your abdominal muscles. When you inhale, place your feet on the floor and stretch your arms overhead. You should feel some stretching in your belly, sides, and the back of your body. On the exhale, curl up again and repeat this sequence, following your breath.This pose is great for relieving lower back pain, which many studies link to pelvic floor dysfunction.
3. Cat-Cow (Marjaryasana and Bitilasana)
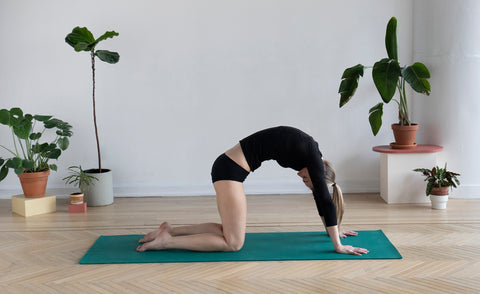
Position your hands and knees on the mat directly underneath your shoulders and hips, and inhale to Cat pose by tilting your pelvis forward and bending your spine. On the exhale, transition to Cow pose, dropping your tailbone first, and curving in your back. Lindsay says you should initiate each movement from the pelvis, and continue to let your breath set the pace.
Cat-Cow brings awareness to specific areas of your pelvis that might be a little immobile or painful.
4. Warrior II (Virabhadrasana II)
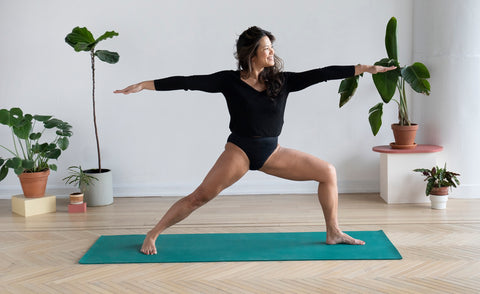
This pose is like the ancestor of modern power posing. Standing at the top of your mat, step your left foot back about three feet and bend your right leg. Stretch your arms out to reach over your legs, and look past the tips of your front fingers. Make sure your front knee tracks over your front foot, so you’re working your glutes for better pelvic floor support.
Once you’re in this shape, Lindsay says you can find a microscopic Cat-Cow pattern to activate and release your pelvic floor muscles, which leads to a strong pelvic floor.
5. Wide-Legged Forward Fold (Prasarita Padottanasana I)
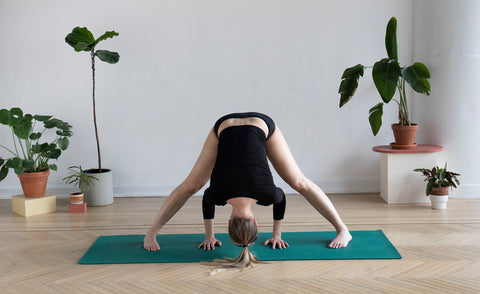
Place your feet wide on the mat and slowly lower your upper body, keeping your back long and protected. In a Wide-Legged Forward Fold you’re opening up your hamstrings and groin, which relieves tension in the pelvic floor but it’s important to move at your own pace to avoid injury. If the fold feels a little too intense, you can bend your knees, or use a prop (yoga blocks, bolsters, blankets, or a pillow are great options) under your head for extra support. Take time to find your breath, and incorporate small Cat-Cow movements to connect your awareness to your pelvic muscles.
6. Wide-Legged Squat (Malasana)
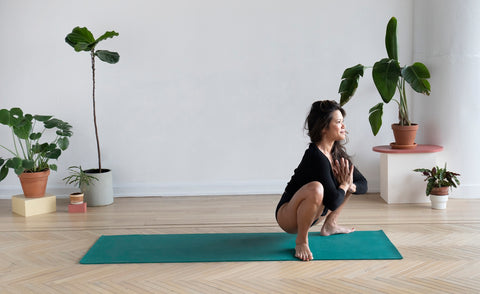
Stand with your feet mat-distance apart, and squat down. Press your elbows into your knees, heavy your tailbone, and lift your chest. Placing your hands together in prayer on your sternum will help you connect to the rise-and-fall of your inhales and exhales. You should aim to have a long back here, so you can really open up your pelvic region.
Wide-Legged Squat is a more challenging inner thigh and groin opener than Wide-Legged Forward Fold. If it’s too uncomfortable — never try to push through any pain! — you can always place a prop under your seat.
7. Reclining Cross Shin Position (Supta Sukasana)
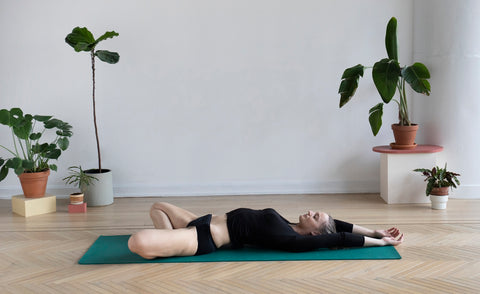
This pose is all about resting and observing. Sit at the top of your mat with your legs crossed comfortably, then slowly lie back until you’re resting flat on your mat. Close your eyes, rest your arms at your sides, and give yourself a minute (or ten) to decompress and check in with your breath.
This should feel restful, so you can always place blankets or pillows under your thighs for support if your muscles feel stretched too tight. It’s a similar pose to the one we started with, so be sure to take inventory of all the shifts that have happened in your body since the beginning of the flow.
What are your go-to stretches when you’re looking to give your pelvic floor a little love? Have you tried pelvic floor yoga? Share your thoughts with us in the comments.
At Thinx, we strive to provide our readers with the most up-to-date, objective, and research-based information. Our content is crafted by experienced contributors who ground their work in research and data. Articles contain trusted third-party sources that are either directly linked within the text or listed at the bottom to lead readers to the original source.
Posted: July 31, 2019
Related Articles
one new subscriber wins a free pair of Thinx every day! see rules


